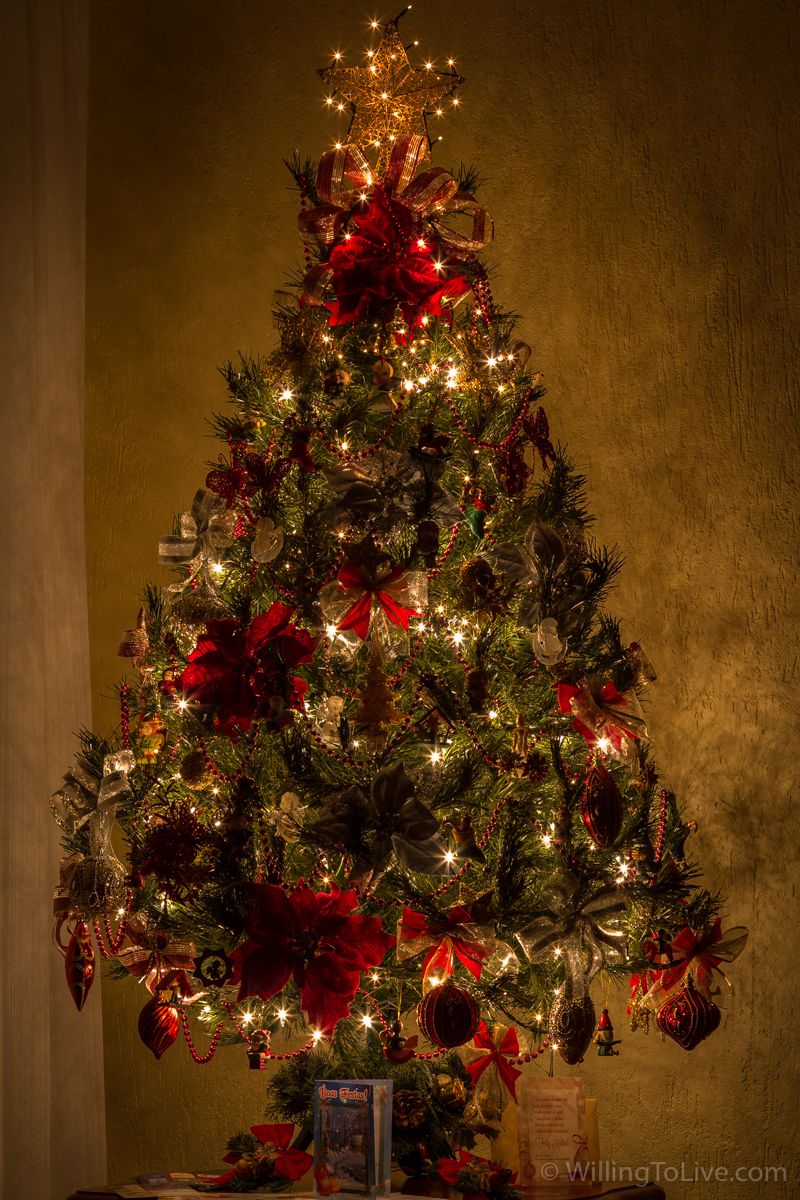
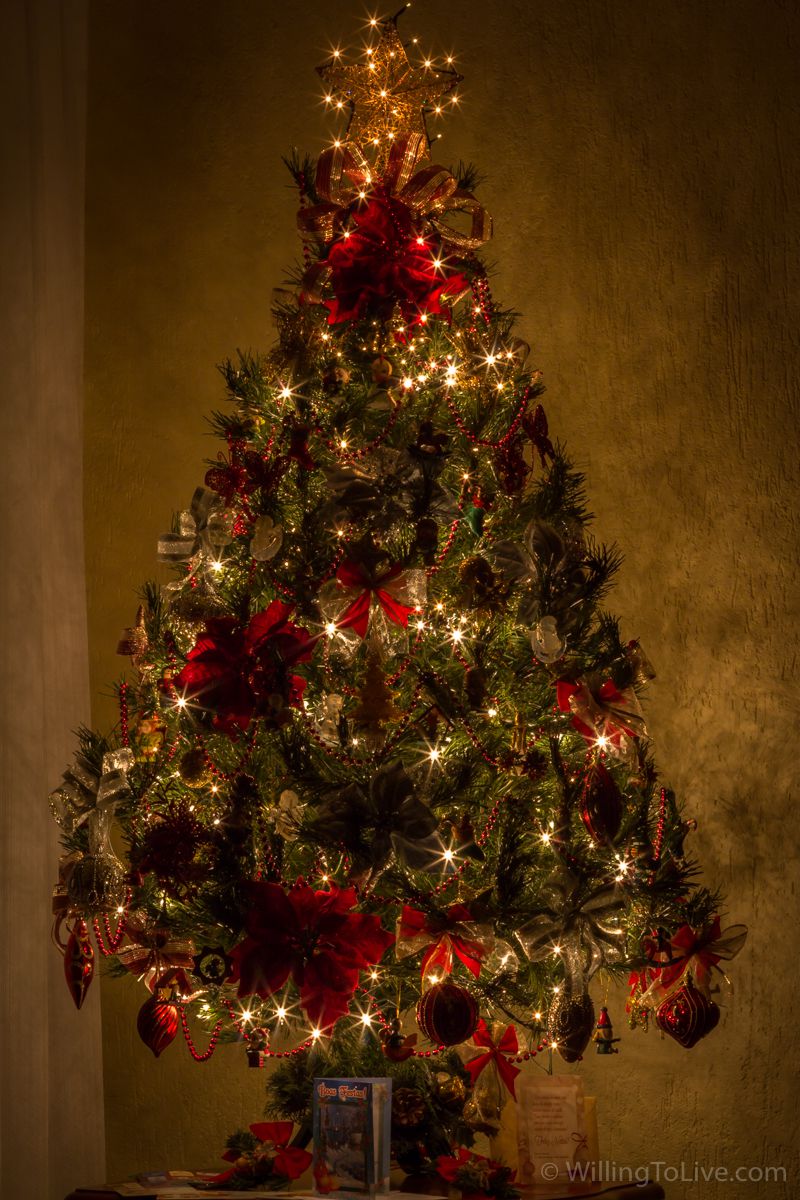
How to create the star effect or starburst effect using your Christmas tree
Today’s photography topic is the star effect or starburst. Christmas is just around the corner, so it is a good and easy time to practice it with your Christmas tree.
Let’s go!
How can I create the star effect or starburst?
In photography, you have 3 basic ways to control light in your camera, ISO, shutter speed, and aperture. For our effect, what makes the trick is aperture.
It is pretty easy to create this effect, you just have to use a small aperture (high f-number). That is the most important thing to have in mind.

Typical aperture values are displayed below. For starburst effect, typically you will have better results using apertures from f11 to f22. Remember that a big f-number means a small aperture size in your lens. Start with an aperture in this f value range, make the shot and readjust according to your desire.
You can create this effect with any light source (sun, street lamps, reflected light …) during the day or at night. For the night time, it is fairly common to have the effect on urban landscapes shots.
Easy, right?
Going a little deeper…
What causes it?
But, Filipe, what causes this effect? Well, what creates it is the light diffraction over the aperture blades of your lens.
So, you should be thinking that the aperture blades may have an impact on the effect. Yes, they do. The number and shape of the blades have a direct impact over the starburst, not just the aperture size. If the aperture blades create a perfect circular shape, you won’t have the effect. But usually that is not the case.
Do you know how your lens behaves? How many starburst rays it produces? Experiment with your lens and share the results in the comments below or in your social networks using #starburstchallange and tag me using @filipemorgadosc.
How to increase the effect?
More than that, you will get better results when you have a bright and point source of light surrounded by a dark background (more contrast), this is the ideal situation.
How can you increase contrast when this ideal scenario is not possible? You can try to mask the light source. For example, having the sun behind a tree, its leafs or any other dark object that can mask part of the sun. You will create not just more contrast but a smaller light source.

Please, take care when looking at the sun through your viewfinder. This can be dangerous to your eyes. Using the live view mode (LCD) is safer. Don’t stare directly at the sun.
Smaller focal length also creates smaller physical apertures, so it can help you to create a more prominent effect. This happens because the light is passing through a smaller hole, so more diffraction.
You may be thinking why a small focal length produces a small aperture if my f-number is the same? Remember that the f-number equals to f/D (where f is the focal length and D is the diameter of the aperture size). So, if you have the same f-number on your camera, if the focal length is smaller, the diameter should also be smaller so that you have the same f-number value.
The side effect
Not everything is great when trying starburst. There is a side effect of having light diffracted. You will lose sharpness in your image.
So, don’t go that crazy high on the f-number if you want the sharpest image your lens can create. Usually, lenses start to lose sharpness when apertures values are f11 or more.
A way to overcome this is to do multiple exposures with different apertures and combine them later in post-production. But this is not the purpose of today’s post.
Summing it up:
- The smaller the aperture (bigger f-number), the more pronounced the effect.
- Starburst is caused by diffraction and different aperture blades (shape and number) create a different star effect.
- The more contrast (brighter than the surrounding environment), the more noticeable the starburst.
- The smaller the focal length, the more intense the starburst can be.
- The more punctual the light source is, the better for the final star effect.
Your turn!
Now it is your turn! Experiment, practice and have fun!
Why a Christmas tree is a good idea?
- You will probably have one nearby for the next few days.
- They have small and bright light sources with high contrast, especially if you turn off the lights of the room it is in.
- You may get worth remembering photos of your Christmas :)
Start testing what I’ve said here in the post and the creative flow should start running :). Maybe you have a new lens and want to know how its star effect looks like :). Four years ago, I’ve tried the effect with my Christmas tree. Now I will practice it again to discover how the start effect looks like with the lens I’ve bought this year :).
So, here we go:
- Get your camera and all lenses you have. You probably need a tripod or something else to place your camera so that it keeps still while it takes the shot.
- Start with the room’s lights turned off and your Christmas tree lights turned on.
- Set a small f-number for the aperture.
- See how it goes. Experiment with different f-number values.
- Experiment with other lenses to see how the effect changes.
- Effect learned. Now be creative and have even more fun :)
Share your results in the comments below or in your social networks using #starburstchallange and tag me using @filipemorgadosc.
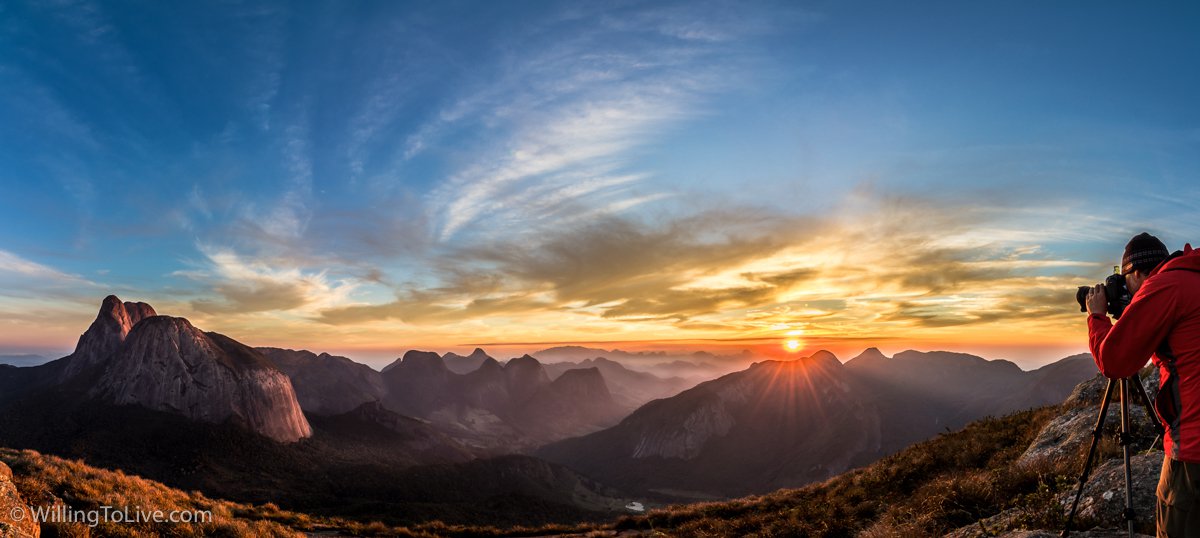
You can also experiment it on many other occasions, not just at night, but during the day too. An example?

If you do or don’t celebrate Christmas, I hope you are in good health, in peace, surrounded by your loved family and always learning and improving your life :)
I think you will like those similar posts too:
More similar posts at the end of the page…


